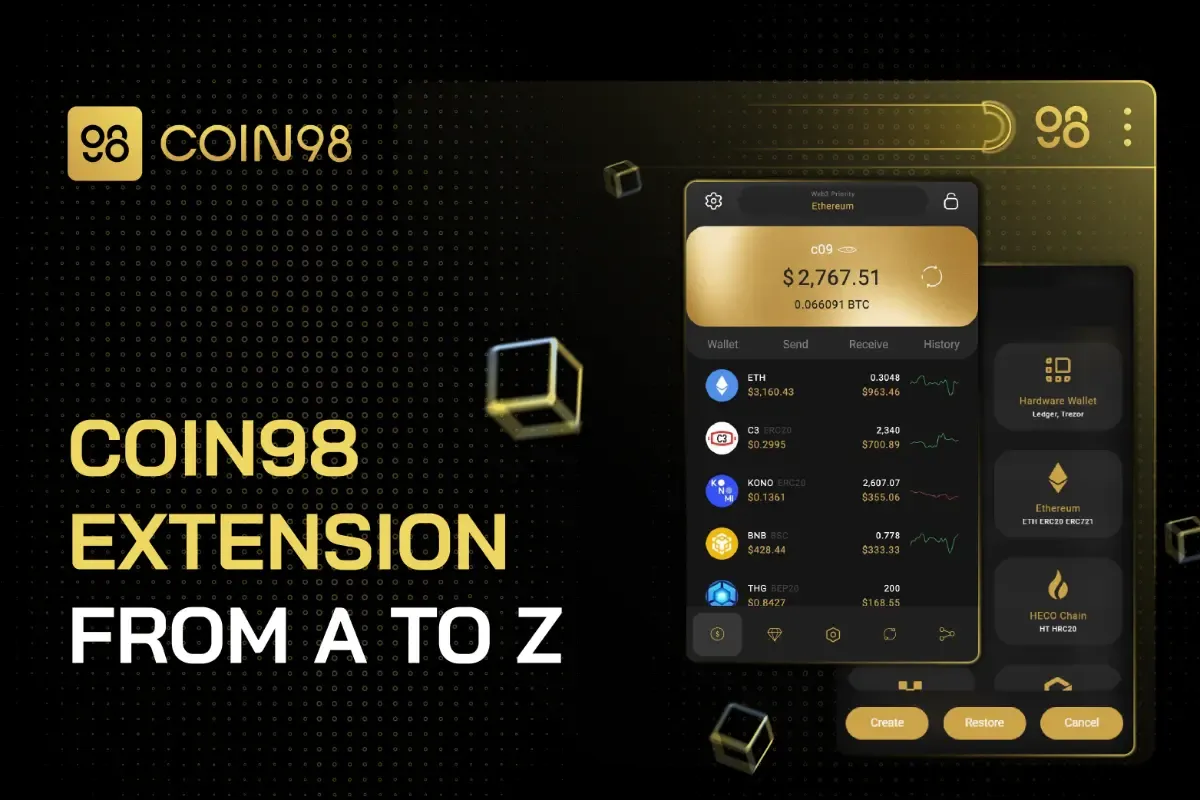
What is Coin98 Extension? How to use Coin98 Extension A - Z
What is Coin98 Extension?
Coin98 Extension is a non-custodial, multi-chain wallet of crypto and NFTs that gives users control of their own keys, addresses, and funds. Coin98 Extension offers users another option to interact with the whole Coin98 ecosystem, access hundreds of dApps, trade tokens on DEXs, earn interest on your crypto, mint and buy NFTs.
Outstanding features of Coin98 Extension
Multi-chain support
Coin98 Extension offers users fast, convenient, and secure procedures for storing, sending and receiving on 50+ popular blockchains, including Ethereum, BNB Chain, Near, Avalanche, Polkadot, Cosmos, Terra, Fantom, Klaytn, THORChain, Arbitrum, Optimism, and more. Besides that, the Custom Network feature is also available on Coin98 Extension. Currently, users can add unlimited Custom Networks with this feature.
Web3 Gateway
Coin98 Extension allows users to access numberless dApps Terra, Cosmos-based chains, other 23 blockchains currently integrated into the Web3 Priority feature, and more to come. Besides, users also can add many custom networks autonomously and smoothly for Testnet and Mainnet, broadening the gateway to every corner of DeFi and Web3.
Top-tier security
Coin98 Extension enhances users’ experience by providing top-tier security for their assets: 2 password setting options (Text Password or Matrix Password) and the Extension lock feature.
Store, send and receive multi-chain NFTs
Coin98 provides a cosmos for safe, straightforward handling and storage of NFTs. Our users are able to store, send and receive multi-chain NFT directly on EVM blockchains and Solana.
Especially, all NFTs on Avalanche, BNB Smart Chain, Ethereum & Polygon are automatically displayed on Coin98.
Trade natively with top-tier DEXs on multiple blockchains
Currently, Coin98 Extension has integrated various DEXs from multiple blockchains: PancakeSwap (BNB Smart Chain), MDEX (BNB Smart Chain & HECO Chain), UniSwap (Ethereum), SushiSwap (Ethereum), QuickSwap (Polygon), and Pangolin (Avalanche C-Chain) to name a few.
By integrating these top-tier DEXs, Coin98 Extension offers an all-in-one trading experience in an intuitive interface, allows you to trade natively with an optimized transaction fee, and eliminates the unnecessary steps, such as accessing separate dApp sites, connecting wallets, searching for tokens, etc.
Fiat on-ramp
Coin98 Extension has integrated MoonPay, which eliminates the need for on-ramps via CEXs to participate in DeFi. Right in the extension, users can actively access DeFi protocols without any additional step via a third - party.
Multi-send feature
Coin98 Extension supports the multi-send feature, enabling you to send coins/ tokens to multiple addresses simultaneously. Currently, it is available for 13 blockchains: Ethereum, BNB Chain, Solana, HECO Chain, Avalanche C-Chain, Polygon, Fantom, TomoChain, OKExChain, GateChain, xDAI Chain, Celo (CELO & CUSD), Klaytn, KuCoin Community Chain, KardiaChain, Aurora, Boba Network, Arbitrum on Xdai, Arbitrum on Ethereum, Optimism, Harmony.
Multi-language support
Coin98 Extension now supports 12 languages for users’ convenience and global access.
Hardware wallet support
Coin98 supports users to connect to prominent hardware wallets on the market: Ledger Nano S, Ledger NanoX, Trezor One improving and ensuring the security of user assets.
How to install Coin98 Extension on Google Chrome
Step 1: Find and select Coin98 Extension on Chrome Web Store.
Step 2: Click Add to Chrome.
Step 3: Read the pop-up notification displayed on the screen carefully. To approve, click Add extension.
Step 4: To use the extension, click the extension icon at the right of the address bar. This dropdown will show you Coin98 Extension is installed and enabled on Chrome.
Tip: Pin Coin98 Extension for easy access on the next visit and a convenient connection to dApps.
General Settings
How to set up Coin98 Extension password
Users can choose the type of password between the 2 top-tier options based on their preference:
- Matrix Password: The next-gen type of password that makes Coin98 distinctive from other digital wallets in the market.
Step 1: Pick a number (1);
Step 2: Pick a coordinate (2);
Step 3: Click and hold the mouse → Drag around until the (1) number is in the (2) position.
Pros: Even if someone else is looking at the screen, they can not know your password.
- Text Password: A familiar and easy-to-set-up type of password
Step 1: Enter your password; Step 2: Enter your password to confirm, then select Setup Password. Note: The password is required to have at least 8 characters long including at least 1 digit and 1 symbol.
How to change Coin98 Extension password
Step 1: Open Coin98 Extension → Click the Settings icon at the top right corner;
Step 2: Select Change Password → Confirm your current password;
Step 3: Select password type (Matrix or Text);
Step 4: Set up a new password by following the instruction about setting up a password above.
How to change the language
Coin98 Extension currently supports 12 languages, including English, Tiếng Việt (Vietnamese), 中文 (Chinese), 日本語 (Japanese), Español (Spanish), Français (French), Indonesia, 한국어 (Korean), Português (Portuguese), Pусский (Russian), ภาษาไทย (Thai), Türkçe (Turkish).
Users can switch between the languages by clicking the Settings icon → Click Change Language → Select a language.
How to open Coin98 Extension on Expand View mode
Access a full-screen mode of Coin98 Extension within one step:
Click the Settings icon at the top right corner → Select Expand View.
Store and manage multi-chain assets with Coin98 Extension
How to create a new wallet
A Multi-Chain wallet allows you to store, send & receive many coins/tokens on different blockchains all in one place, with only one Passphrase. Users can currently use the Multi-chain wallet for a total of 50+ blockchains supported on Coin98 Extension.
Step 1: Click the Manage Wallet icon at the top left corner of the home screen → Click the add wallet icon at the top right corner;
Step 2: Select Multi-Chain or a single chain as desired → Click Create;
Step 3: Enter your wallet name → Click Next;
Step 4:
- Back up the recovery key correctly in a safe place. Please note that this key is important for you to have access to your wallet and funds;
- Copy and paste the recovery key into the reconfirmation box;
- Read the caution carefully and tick to confirm your awareness of the risks if you lose keys.
Step 5: Click Create Wallet to complete.
Your new wallet will instantly be displayed on the home screen. You can also access the Manage Wallet section again to check all your wallets on Coin98 Extension.
How to restore a wallet
Step 1: Click the Manage Wallet icon at the top left corner of the home screen → Click the add wallet icon at the top right corner;
Step 2: Select Multi-Chain or a single chain → Click Restore;
Step 3: Name the wallet and input the Passphrase/Private Key;
Step 4: Click Restore to complete.
Note: Coin98 Extension supports 2 standards (New Standard and Old Standard) for each wallet on some blockchains.
New Standard is set as default when restoring wallets. If you want to restore with Old Standard instead, you can click the Settings icon at the top right corner → Select the desired standard.
Solana Wallet:
- New Standard is an import option if you have created a new standard wallet on Coin98 before. It's also an improved option that allows users to restore Phantom/Sollet wallets while keeping the old wallet address format.
- Old Standard is an import option for old standard wallets created on Coin98. If you have used the New Standard, you can ignore this standard.
Celo, Avalanche (C-Chain), Tomo Chain Wallet (EVM blockchains):
- New Standard is the import option if you have created a new standard wallet on Coin98 before. In this standard, EVM's addresses will have the same wallet address as the Ethereum wallet.
- Old Standard is an import option for old standard wallets created on Coin98. If you have used the New Standard, you can ignore this standard.
How to synchronize Coin98 Super App with Coin98 Extension
Users can use Passphrase/Private Key to synchronize a wallet created on Coin98 Super App with Coin98 Extension to manage their assets anytime, anywhere with both our versions.
Step 1: Get the Passphrase/Private Key of the wallet you want to synchronize between the Super App and the Extension.
Passphrase/Private Key must be saved in a safe place when users create wallets on Coin98 Super App. You can copy your backed-up Private Key/Passphrase and move on to the next step.
However, if you accidentally deleted, or forgot your keys, then here’s how to retrieve them on Coin98 Super App: Click All Wallets from the home screen → Select the wallet name → Click Show Private Key & Passphrase.
Step 2: Click the Manage Wallet icon at the top left corner of the home screen → Click the add wallet icon at the top right corner.
Step 3: Select Multi-Chain or a single chain as desired → Click Restore.
Step 4: Name the wallet and enter the Passphrase/Private Key in Step 1 → Click Restore to complete.
Kindly refer to the notes about import standard options in the previous instructions.
How to activate and manage wallets
Step 1: Click the Manage Wallet icon at the top left corner of the home screen.
Step 2: Switch the button next to the wallet as desired to turn it ON/OFF. If the wallet as desired is inside a multi-chain wallet, you can click the multi-chain first → Dropdown all of its single-chain wallets → Select the desired one.
Note: You can create as many different wallets as wanted on any of the supported blockchains. However, if you have multiple wallets on the same blockchain, only one of them can be displayed on the home screen at a time.
How to copy wallet address from Manage Wallet
Step 1: Click the Manage Wallet icon at the top left corner of the home screen.
Step 2:
- If it is a single-chain wallet: Click the wallet name→ Click Copy Address.
- If it is in a multi-chain wallet, let’s click the multi-chain to drop down all the single-chain wallets inside first → Select the desired one → Click Copy Address.
How to rename wallet
Step 1: Click the Manage Wallet icon at the top left corner of the home screen.
Step 2: Select the wallet you want to rename. If it is a multi-chain wallet, kindly click the multi-chain first → Click on any single wallet inside of it.
Step 3: Click Rename.
Step 4: Insert new name → Click Change to complete.
How to remove wallet
Step 1: Click the Manage Wallet icon at the top left corner of the home screen.
Step 2: Select the wallet you want to remove. If it is a multi-chain wallet, kindly click the multi-chain first → Click on any single wallet inside of it.
Step 3: Click Remove Wallet.
Step 4: Enter the wallet name → Click Remove to complete.
Note: Please make sure you have backed up the Passphrase of the wallet correctly and safely before removing the wallet. In case of losing keys, you won’t be able to restore the wallet and fund when needed.
How to add Custom Networks on Coin98 Extension
Step 1: Click the Services icon from the home screen → Select Custom Network.
Step 2: Click the [+] button at the top right corner.
Step 3: To add the custom network that you want to use via Coin98 Extension, you have to fill in the information below:
- Profile (optional);
- Network Name;
- RPC URL;
- Chain ID;
- Symbol;
- Block Explorer URL (optional).
Notes:
- For the Testnets and Mainnets available in the Profile, users only need to select the name of the network. The system will automatically update the rest parameters after that. Currently, Coin98 has updated 34+ available profiles.
- For networks that are not available in the Profile, you must manually enter the required parameters that are provided on the official websites of those networks.
Step 4: Click Create to complete.
After having created Custom Network, you can create a wallet on it as usual.
Read more: Add custom networks to Coin98 & Skin in the Game boundlessly
To remove a created network, you can click the [-] button next to it from the Custom Network section.
How to add Custom Tokens
Along with already supported coins/tokens, users can add tokens by themselves easily with simple steps as follows:
Step 1: Open Coin98 Extension → Click the Services icon from the home screen → Select Custom Tokens.
Step 2: Click the [+] button at the top right corner to add a new token.
Step 3: Fill in the required token information:
- Blockchain;
- Contract Address;
- Symbol;
- Name;
- Decimals.
Users only need to select the Blockchain and enter the Contract Address of the coin they want to add to the wallet. The remaining data will be automatically updated after the user enters the correct contract address.
In case the system fails to extract the data, you can manually fill in the remaining parameters in the required cells.
Step 4: Click Create to complete.
Have no idea about how to get the token information? Read more: How to add Custom Tokens on Coin98 Super App
To remove a custom token, you can click the [-] button next to it from the Custom Tokens section.
How to receive coin/token into Coin98 Extension
- Option 1
Step 1: Select the coin/token from the main screen.
Step 2: Click Receive.
Step 3: Copy the wallet address and use this address to receive your tokens.
- Option 2
Step 1: Click Receive from the main interface.
Step 2: Search for the name of the coin/token you want to receive in your wallet.
Step 3: Click on the receive icon next to the coin/token name.
Step 4: Click the copy icon next to the wallet address as desired if you are having more than one wallet on the same blockchain.
Note:
- In Step 2, if the token you are searching for can not be found in the "Receive" section, this means the token has not been supported by Coin98 yet. In this case, if the token is listed on CoinGecko or CoinMarketCap, you can request to get the token added by us by filling in this form: https://c98.link/submit-token
- You also get your wallet address from the Manage Wallet section as instructed in the previous parts.
- Please pay attention to the corresponding network. For example, make sure to use a BNB Smart Chain (BEP20) wallet address to receive BEP20 tokens.
- Depending on the project, a token can be available on various blockchains. Please make sure you select the token on the right network as desired.
How to send a coin/token from Coin98 Extension
- Option 1
Step 1: Select the coin/token you want to send from the main interface.
Step 2: Select Send.
Step 3: Fill in the amount, wallet address, and message to the recipient (if any).
Step 4: Click Send to finish.
- Option 2
Step 1: Click Send on the main interface.
Step 2: Select the wallet that contains the coin/token you want to send (1), and then select the token/coin (2).
Step 3: Enter the amount, receiving wallet address, and message for the recipient (if any).
Step 4: Click Send to finish.
Note:
- The default gas fee on Coin98 Extension is set at the standard rate for the fastest speed at the most reasonable cost.
- In addition to the default gas fee, Coin98 Extension also has an optimized gas engine that allows adjusting the gas fee according to your needs.
How to use Multi-Send on Coin98 Extension
Step 1: Select the token you want to multi-send from the home screen → Click Multi-Send.
Step 2: Enter the receiving wallet addresses and the amounts. There are 2 ways to do it:
- The first way: Enter each wallet address separately (Recipient 1, 2, 3,...,n) and the corresponding deposit amount on each row.
- The second way: Enter the addresses and the amount of tokens/coins following the syntax below:
wallet address?amount;wallet address?amount
For example: 0xAC75c347083a833BA8717fEC02C64d65CdDE7F40?1;0x3870Bda477474bF0c5cDA6cB44c36B061f510bC9?2;0x286bB01FEe2f8617DA83A522Ef27E3A96807fed6?3
Note: The first way is set as default. In order to switch to the second way, kindly click the Settings icon at the top right corner of the first way interface.
Step 3: Adjust the Gas Fee according to your needs (fast or slow processing speed). You can choose the gas fee level with the transaction processing speed. This is one of the outstanding advantages of Coin98, helping you to be proactive in adjusting gas - speed, and at the same time increasing your ability to win the gas war.
Step 4: Click Send to finish.
Note:
- The default gas fee on Coin98 has been set for the highest speed with the most reasonable cost.
- Users need to have a proper amount of the blockchain’s father token for the gas fees, i.e. ETH for Ethereum, SOL for Solana, etc.
- After sending successfully, you can access the Token History to view your transactions. To view further information on the transactions, you can also check on blockchain explorers.
How to store NFTs on Coin98 Extension
With the rapid growth of NFTs, Coin98 aims to provide users with a one-of-a-kind DeFi experience and opens the door for all users to enter the NFT/ GameFi sector with ease.
To switch to the NFT storing tab, please follow the following steps: After opening Coin98 Extension, click the NFTs tab in the upper navigation bar of the home screen.
If you have already owned an NFT or imported a wallet from another application, your NFT will be fully displayed in this interface.
Your own NFTs will be stored and classified by each supported project. Users can check the number of holdings and see detailed information on each type of NFT when clicking on the project's logo.
How to receive NFTs to Coin98 Extension
Step 1: Select the NFT you want to receive on the home screen of the NFTs section.
Step 2: Click Receive.
Step 3: Click the copy icon to copy the wallet address → Send NFTs to this address.
In case you have not had the NFT on Coin98 Extension yet, you can get the wallet address from the Manage Wallet section (Check out more details in the previous instructions) to receive it. Just make sure you get the wallet address corresponding to the blockchain the NFT is based on.
How to send NFTs from the Coin98 Extension
Step 1: Select the NFTs you want to send on the home screen.
Step 2: Click Send.
Step 3: Enter the required information:
- NFT wallet address of the recipient (you can use quick action buttons such as QR code scanning, contacts);
- Enter the message for the recipient (if any);
- Adjust the gas fee slider (Gwei) to your needs.
Step 4: Click the Send button to complete the transaction.
Note:
- The default gas fee on Coin98 Extension has been set at the standard rate that offers the most optimized speed at a reasonable cost.
- The transaction fee is calculated differently depending on the projects built on which blockchain. Users need to prepare the blockchains' native coins in the corresponding wallets of the respective chains
- If you want to skin-in-the-game right from the NFT display interface, just click the "Play" button.
How to see transaction history
- Token’s History
Step 1: Click the Manage Wallet icon at the top left corner of the home screen → Activate (turn on) the wallet containing the token you want to see history.
Step 2: Click the token from the home screen to see its history.
- Wallet’s History
Step 1: Click History from the home screen.
Step 2: Click the wallet name at the top corner → Select the wallet you want to see history.
How to see Passphrase/Private Key again on Coin98 Extension
Passphrase/Private Key must be saved in a safe place when users create wallets on Coin98 Extension.
However, if you accidentally deleted, or forgot your keys, then here’s how to retrieve them as follows:
Step 1: Click the Manage Wallet icon at the top left corner of the home screen.
Step 2: Click the wallet name → Click Show Private Key & Passphrase.
If it is a multi-chain wallet, click the multi-chain first → Click a small single-chain wallet inside → Click Show Key Info.
Note: All sub-wallets inside a multi-chain wallet have the same Passphrase. Besides, in case you need this, each of them might have a Private Key as well depending on each blockchain.
How to trade natively on Coin98 Extension
Trade natively on Coin98 Extension with a few simple steps:
Step 1: Open Coin98 Extension → Select the Exchange icon in the upper navigation bar.
Step 2: Click the DEX icon at the top left corner → Select the DEX as desired.
Step 3: Fill in some information:
- Select the wallet containing the token/coin you want to trade;
- Choose the trading token from the list. For new tokens that are not supported on Coin98 Extension yet, you can copy & paste the Token Contract Address into the search bar and trade it as usual;
- Enter the amount and adjust the gas based on your needs;
- You can also adjust Slippage Tolerance, Transaction Deadline, and other factors in the Advanced Settings.
Step 4: Review the order again and make sure that you agree to swap, then click Confirm to finish.
Note:
- The default gas fee on Coin98 Extension has been set for the highest speed with the most reasonable cost.
- The arrow in the middle of the trading interface is used to switch between the buying and selling positions. You need to check the tokens’ positions carefully before making any transaction.
- You need to have the corresponding blockchain wallet and a proper balance of father tokens in this wallet to pay the fee before trading.
- The Approve step is only displayed in the very first trade. In the following trades, you only need to click Swap to complete the transactions.
- In addition to the network fee and the fee for LP, Coin98 Native Swap will charge a fee of 0.8% on the token swap for each transaction. This fee will be used for buying back C98 and supporting the continuous development of making Coin98 better in the future.
After swapping successfully, you can go to the main screen or the Trade History tab at the top right corner of the trading interface to check the traded tokens if needed.
How to buy coin/token by fiat via MoonPay
Coin98 Extension has integrated MoonPay, which eliminates the need for on/off ramping via CEXs to participate in DeFi. Users can now buy coins/tokens by fiat right via MoonPay on Coin98 with some simple and easy steps below:
Step 1: Click the MoonPay icon from the home screen.
Step 2: Select your desired crypto → Enter the amount → Click Continue.
Step 3: Enter your wallet address to receive your coins.
Note: The required wallet address will depend on the crypto you want to buy, please read the information carefully and input the correct wallet address on the corresponding blockchain.
Step 4: Input your email and verify by the code sent to it.
Step 5: Enter your personal information to confirm the KYC, then fill your card details to complete the transaction.
Read more: How to buy coin/token by fiat via MoonPay on Coin98
Ultimate gateway to the Web3 DApps
How to switch Web3 Priority
Web3 Priority on Coin98 Extension is a feature that helps users easily switch wallet connections between supporting blockchains to experience decentralized applications (dApps) easily and conveniently.
Currently, Coin98 Extension has integrated 23 blockchains on Web3 Priority: Ethereum, BNB Smart Chain, HECO Chain, OKExChain, GateChain, KuCoin Chain, Solana, Near, Avalanche C-Chain, Polygon, Fantom, Gnosis Chain, TomoChain, KardiaChain, Ronin, Celo, Klaytn, Harmony, Optimism, Boba Network, Arbitrum, Arbitrum on Gnosis, Aurora and more to come.
Besides, users also can make use of the Custom Networks feature to add new networks to Web3 Priority autonomously and smoothly for testnet and mainnet.
Depending on the dApp, it can be connected with different blockchains. Therefore, you must adjust the corresponding Web3 Priority for the connection.
Step 1: Open Coin98 Extension → Click the Web3 Priority bar at the top of the home screen.
Step 2: Select the blockchain which is corresponding to the dApp you want to connect.
How to connect dApps with Coin98 Extension
In this instruction, we will use PancakeSwap as a reference. The steps might be similar when connecting to other dApps.
Step 1: Switch Web3 Priority to the blockchain that corresponds to the dApp following the previous instructions.
Step 2: Access PancakeSwap → Click Connect Wallet button.
Step 3: Select Coin98 → Confirm the connection;
Note: In the case of using multi-chain DApp with Wrong Network error, users need to switch the corresponding network in Web3 Priority.
High level of security
Audit
Coin98 Extension is already audited with private code.
Coin98 Extension Locking feature
- How to lock Coin98 Extension: Directly click on the lock icon in the right corner of the home screen.
The extension will ask you to confirm the password for unlocking (Matrix or Text Password as you set up).
This locking feature together with Matrix Password - the next-gen type of password uniquely on Coin98 - will provide users with the maximum protection possible.
- How to unlock Coin98 Extension
Step 1: Open the Coin98 Extension.
Step 2:
(1) If your password is a Text Password, enter your password → Click Unlock.
(2) If your password is a Matrix Password, click and hold your mouse → Drag the number until it is in the right position.
Support hardware wallet
Coin98 Extension has supported connecting to the most popular hardware wallets available on the market such as Ledger Nano X, Ledger Nano S, and Trezor One, which enables a whole new level of “funds-are-safu”: to have the security of cold storage with the convenience of a hot multi-chain wallet.
Read more:
Disconnect Coin98 Extension from connected dApps
Users can review all the dApps connected and disconnect them easily right in the Coin98 Extension interface, which provides users with convenience and security when accessing various platforms/applications to skin in the game on DeFi.
Step 1: Open Coin98 Extension → Click the Connected Dapps icon in the upper navigation bar.
Step 2: Click the remove icon next to the dApp you want to disconnect or click the top one to disconnect all dApps.
Reset Extension
In some cases when users want to clear all available wallets on Coin98 Extension at once, they can use the Reset feature.
Step 1: Open Coin98 Extension → Click the Settings icon at the top right corner.
Step 2: Select Reset Extension.
Step 3: Read the caution carefully → Click Confirm → Click OK to complete.
Note: Please make sure you have backed up your Passphrases and Private Keys of your wallets correctly in a safe place before resetting Coin98 Extension.
Powerful DeFi tools
Override Wallets with Coin98 Extension
When users install various wallet extensions into the same browser, there will be some cases such as: override wallet situations; connected directly wallet in default (Metamask instead Coin98 Wallet); or etc. We recognize the annoying situations for our users; therefore, we are improving the feature Override Wallet (on/off button) to let users control their preference toward which Extension they want to interact with.
Step 1: Open Coin98 Extension → Click the Settings icon at the top right corner.
Step 2: Select Override Wallets.
Step 3: Switch the button next to each extension wallet to turn it ON/OFF.
In terms of turning off those wallets, you allow other Extensions to override Coin98 Extension.
FAQs
Is Coin98 Extension different from Coin98 Super App?
Coin98 Super App is the #1 crypto app designed to seamlessly connect a billion users to the crypto world safely and securely. The app offers users across the globe a comprehensive and trusted ecosystem of essential services including but not limited to a non-custodial, multi-chain NFT & cryptocurrency wallet, built-in DEXs, SpaceGate (Cross-Chain Bridge) & DApp Browser, a powerful Terminal, attractive Earn, Gift & Campaign, and others.
Coin98 Extension is similar to Coin98 Super App, but is the wallet version used specifically on PC. You can use Coin98 on the mobile app and extension simultaneously.
Why can I not synchronize my wallet between Coin98 Super App and Coin98 Extension and the wallet address is changed?
A Passphrase is usually a sequence of readable English words, from 12 to 24 words, randomly generated when creating a wallet. Passphrase can decode an infinite number of wallets, numbered from index 0 to index n. Each wallet corresponds to a Private Key and an address.
Therefore, if you synchronize/restore wallets using Passphrase but the wallet changed and the balance shows 0, try using Private Key instead if possible to recover the wallet because one Passphrase will be able to generate many private keys → multiple wallet addresses. If this method still does not work, please refer to the following cases:
Case 1: The Passphrase/Private Key wasn't correctly input as follows:
- The Passphrase/Private Key has missing letters or typos. Check to see if you entered any words incorrectly.
- Each word of the Passphrase was correct but was input in the wrong order. Please keep in mind that different orders of words will result in different wallets. Make sure the seed phrase is entered in the correct order.
Case 2: The Passphrase was input correctly but not in a right standard
Coin98 Extension supports two standards (New Standard or Old Standard) for each wallet on some networks. If you did not choose the right standard to which the initial wallet belongs, it cannot be properly recovered.
Solana Wallet:
- New Standard is an import option if you have created a new standard wallet on Coin98 before. It's also an improved option that allows users to restore Phantom/ Sollet wallets while keeping the old wallet address format.
- Trezor One hardware wallet is an import option for old standard wallets created on Coin98. If you have used the new standard, you can ignore this standard.
Celo, Avalanche (C-chain), Tomo Chain Wallet (EVM blockchains):
- New Standard is the import option if you have created a new standard wallet on Coin98 Super App before. In this standard, EVM's addresses will have the same wallet address as the Ethereum wallet.
- Old Standard is an import option for old standard wallets created on Coin98 Super App. If you have used the new standard, you can ignore this standard.
Case 3: The Passphrase/Private Key wasn't correctly written down originally:
The Passphrase/Private Key wasn't written down correctly the first time. In this case, we can't assist you to retrieve your wallet because we do not own or save users' keys, as a result, we do not have access to users' wallets.
Does Coin98 Extension work on other Chromium browsers?
Coin98 Extension might work on Chromium browsers such as Brave, Microsoft Edge, etc. However, for best optimization, it is recommended to install Coin98 Extension on Google Chrome so far.
Why is my token balance not loading or showing on Coin98 Extension?
This is most likely because of one of these reasons:
1. Bad internet connection: We recommend you check the wifi or cellular connection.
2. Not using the latest version: Please update to the latest version by following this: Go to Manage Extensions of Google Chrome → Click the Update button if any;
3. Unstable RPC: Please wait for the RPC to be stable.
4. Inactive wallet: Please check and make sure to activate your wallet.
You can refer to the previous instructions about how to activate and manage wallets.
5. Token is not supported yet: Please add Custom Tokens or request Coin98 to add the token for you if it is listed on Coingecko or CoinMarketCap via this form: https://c98.link/submit-token
6. Supported token but you are using the wrong network: Please check the blockchain network to assure that it matches with the token's network and restore the wallet if necessary.
For example: You sent USDT to your BEP20 wallet address but selected the ERC20 network to withdraw from a centralized exchange. In this case, you need to use the Passphrase/Private Key of your BEP20 wallet address to restore the same one but on the ERC20 network if you have not had that ERC20 wallet yet.
7. Bug or other reasons behind: If you have checked out all cases above but still can’t figure it out, please contact us via Live Chat Support for better support and avoiding scammers.
Why did my transactions fail?
There are many reasons why a transaction on Coin98 Super App may be failed becaused of the following reasons:
1. Trading tokens with an insufficient balance of the gas fee
=> Users don’t have the native coin/ token on the corresponding blockchain to pay for the gas fee or the amount of this coin/token is not enough to conduct a swapping order.
Despite the fact that Coin98 has integrated the gas fee optimization mechanism, swapping via AMM goes through many routes and costs a lot of fees. So remember to save yourself a decent amount of this coin/token to avoid interrupting your transaction.
2. The number of tokens is insufficient for swap
=> You don't have enough coins/ tokens balance compared with your entered amount. Please reduce the token amount (should be smaller a little bit than the quantity you are having in the account) or deposit more coins/ tokens to the wallet.
3. Trading tokens with low liquidity or during a volatile market
=> The tokens you're trying to swap are probably small-cap tokens that few people are trading or you're trying to buy or sell tokens during a big price movement.
Although the default Slippage on Coin98 is set at the standard rate of 2%, which is quite safe and applicable to most coins on the market, in the case of volatile markets or low-liquidity pools, users can complete the transactions faster and avoid failures by accepting a higher slippage and slippage tolerance percentage.
4. Trading tokens with a too low gas fee
=> Slow gas fee leads to slow network and time-out. Also, transaction fees can be unexpectedly high when the network is congested.
If you have approved your transaction but still fail, you just need to swap with the same amount of token again without spending any extra approval fee. Users should refer to the average transaction fees on blockchain explorers to adjust the reasonable gas fee.
5. Reverted In the event of a transaction marked as "Reverted," the transaction did not execute and all state has been reverted to the state before the transaction. Error messages may be included as defined in the contract.
Note:
- You can check your transaction status on Etherscan, BscScan, etc.
- Avoid trading when the market has major fluctuations.
- None of the decentralized exchanges could secure a 100% successful transaction. Coin98 Exchange offers the Gas Engine mechanism which helps to optimize the trading fee and reduces failed transactions.
- The gas fee and the processing time are different on each blockchain. You need to double-check the information carefully before approving any transaction. For example, BNB (for PancakeSwap), ETH (for UniSwap, SushiSwap), HT (for MDEX), etc.
Why did I fail to connect to dApps?
You might encounter some issues as follows:
1. Web3 Priority has not been adjusted according to the dApp’s supported blockchain. Please adjust Web3 Priority following the instructions provided previously.
2. Conflict between different Web3 extension wallets, i.e. you have installed Coin98 Extension, Metamask, etc on the same browser. Solutions for this case:
- 1st way: Use the Override Wallets feature (You can refer to the instructions before about how to override wallets)
- 2nd way: Access Manage Extensions section of your browser → Switch the button next to each extension to turn it ON/OFF. Please note to turn on only one extension at a time when connecting to a dApp.
3. Coin98 Extension is opening in Expand View mode. Kindly close this mode when connecting to dApps.
4. If you have tried all that and still can’t connect to the dApp, please feel free to contact us via Live Chat Support for better support and for avoiding scammers.
Conclusion
We hope this A to Z document helps you have a global view about Coin98 Extension and can become a handy guide that accompanies you on your long journey with us.
Rest assured that we will continue to bring you the best experiences possible and more promising features for your DeFi demands. If you have any feedback or suggestion, please spare a few minutes to let us know here.
In case you have a concern when using Coin98’s products and services but can not find the answer on Coin98 Documents, please feel free to let us know via our official support channels below:
Also available in
Vie